Difference between revisions of "Plus III"
m (→Powering On/Off) |
(→Channels and Zones: added intro sentence) |
||
| (9 intermediate revisions by the same user not shown) | |||
| Line 35: | Line 35: | ||
Having trouble with your Plus III? Check out our [[Plus III FAQ]] page! | Having trouble with your Plus III? Check out our [[Plus III FAQ]] page! | ||
| − | |||
==Remote Flash Triggering== | ==Remote Flash Triggering== | ||
| Line 59: | Line 58: | ||
# Connect Plus III to your remote camera via the appropriate remote camera cable. | # Connect Plus III to your remote camera via the appropriate remote camera cable. | ||
# Select Channel and Zone A, B, C, or D via the Channel Up/Down Buttons and Zone Toggle Buttons. | # Select Channel and Zone A, B, C, or D via the Channel Up/Down Buttons and Zone Toggle Buttons. | ||
| + | # For best results, use LR mode on the transmitting PocketWizard and Rx LR mode on the remote radio. | ||
# Press the TEST button on the transmitting PocketWizard radio or fire the camera in your hands. The remote camera will trigger. | # Press the TEST button on the transmitting PocketWizard radio or fire the camera in your hands. The remote camera will trigger. | ||
| Line 65: | Line 65: | ||
*'''E Release Firmware:''' This function is available on all QuadZone Triggering Channels - E Channels 1-32 and LR Channels 1-80. | *'''E Release Firmware:''' This function is available on all QuadZone Triggering Channels - E Channels 1-32 and LR Channels 1-80. | ||
| − | If you are using a handheld camera to transmit to a remote handheld camera (with Plus IIIs on each camera), we suggest using a | + | If you are using a handheld camera to transmit to a remote handheld camera (with Plus IIIs on each camera), we suggest using a remote camera cable on both cameras for best results. Using QuadZone Triggering Channels and half pressing on your transmitting camera's shutter button will keep both cameras set to pre-release and enables the cameras to respond more quickly and consistently. Note: with most mirrorless cameras, you MUST use a cable on the handheld camera as well as the remote camera. |
| + | |||
| + | You can see more details about remote camera triggering [[Remote Camera Triggering | here]]. | ||
''NOTE: A remote radio in the hot shoe of a remote camera and connected by a remote camera cable will automatically engage Auto Relay mode and send out a trigger on the next higher Channel. If you do not wish to engage Auto Relay mode, see the [[#Disable Hot Shoe|Disable Hot Shoe]] section below.'' | ''NOTE: A remote radio in the hot shoe of a remote camera and connected by a remote camera cable will automatically engage Auto Relay mode and send out a trigger on the next higher Channel. If you do not wish to engage Auto Relay mode, see the [[#Disable Hot Shoe|Disable Hot Shoe]] section below.'' | ||
| Line 71: | Line 73: | ||
==Auto Relay Mode== | ==Auto Relay Mode== | ||
[[File:P3-silhouette-5.jpg|right|250px|]] | [[File:P3-silhouette-5.jpg|right|250px|]] | ||
| − | Auto Relay mode | + | With Auto Relay mode, you can use a PocketWizard to remotely trigger your camera and also trigger remote flashes at the same time, in sync with the remote camera. |
| + | |||
| + | Auto Relay Mode requires 3 PocketWizard radios and is the only situation where not all PocketWizard radios are set to the same Channel. The relaying radio (on the camera) receives the signal on one Channel, then triggers the remote radios on the next higher Channel. For more details about Relay Mode, please see the [[Relay Mode]] page. | ||
| − | # Set the transmitting PocketWizard radio in your hands to a desired Channel and Zone. | + | # Set the transmitting PocketWizard radio in your hands to a desired Channel and Zone. This radio can be set to either TxRx or Tx Only. |
# Set the relaying Plus III for your remote camera to the same Channel as the radio in your hands and set Triggering Mode to TxRx. | # Set the relaying Plus III for your remote camera to the same Channel as the radio in your hands and set Triggering Mode to TxRx. | ||
# Connect the relaying Plus III’s Flash/Camera Port to the remote camera triggering port of the camera via a remote camera cable. | # Connect the relaying Plus III’s Flash/Camera Port to the remote camera triggering port of the camera via a remote camera cable. | ||
| − | # Slide the relaying Plus III into your remote camera’s hot shoe. | + | # Slide the relaying Plus III into your remote camera’s hot shoe. Be sure the hot shoe on the camera is enabled. This radio can be set to either Rx Only or TxRx. |
| − | # Connect your remote flash to a PocketWizard receiver via the appropriate sync cable and set it to one Channel higher than the transmitting PocketWizard radio in your hands. | + | # Connect your remote flash to a PocketWizard receiver via the appropriate sync cable and set it to one Channel higher than the transmitting PocketWizard radio in your hands. Make sure all of the radios are set to the same Zones. |
| − | # Press and release TEST on the PocketWizard transmitter in your hands to begin the sequence | + | # Press and release TEST on the PocketWizard transmitter in your hands to begin the sequence. |
*'''Legacy Firmware:''' Simply use the next higher Channel as described above for the receiving radios for the flashes. | *'''Legacy Firmware:''' Simply use the next higher Channel as described above for the receiving radios for the flashes. | ||
*'''E Release Firmware:''' You can combine LR Channels with E Channels for this. Use the LR Channels for the transmitter to camera, then an E Channel for the flash(es). The Channel numbers and Zones need to match as described above. For example: LR Channel 1 in your hand, LR Channel 1 on the camera, and E Channel 2 for the flashes. | *'''E Release Firmware:''' You can combine LR Channels with E Channels for this. Use the LR Channels for the transmitter to camera, then an E Channel for the flash(es). The Channel numbers and Zones need to match as described above. For example: LR Channel 1 in your hand, LR Channel 1 on the camera, and E Channel 2 for the flashes. | ||
| − | ''NOTE: A remote radio in the hot shoe of a remote camera and connected by a remote camera cable will automatically engage Auto Relay mode and send out a trigger on the next higher Channel. If you do not wish to engage Auto Relay mode, see the [[#Disable Hot Shoe|Disable Hot Shoe]] section below.'' | + | ''NOTE: A remote radio in the hot shoe of a remote camera and connected by a remote camera cable will automatically engage Auto Relay mode and send out a trigger on the next higher Channel. If you are not using remote flashes and do not wish to engage Auto Relay mode, see the [[#Disable Hot Shoe|Disable Hot Shoe]] section below.'' |
==Modes of Operation== | ==Modes of Operation== | ||
| Line 105: | Line 109: | ||
|'''LR (Long Range) Mode''' dramatically increases the maximum range of a radio in a given shooting environment. Long Range Mode must be enabled on both transmitting and receiving radios. Use this mode when triggering remote cameras at greater distances. It can also be used with remote flash, but there may be a reduction in maximum X-sync speed. | |'''LR (Long Range) Mode''' dramatically increases the maximum range of a radio in a given shooting environment. Long Range Mode must be enabled on both transmitting and receiving radios. Use this mode when triggering remote cameras at greater distances. It can also be used with remote flash, but there may be a reduction in maximum X-sync speed. | ||
| − | This function behaves differently with Legacy firmware than with the E Release upgrade. Please see below for details. | + | This function behaves differently with Legacy firmware than with the E Release upgrade. There is also a new Rx LR mode for E Release. Please see below for details. |
|- valign="top" | |- valign="top" | ||
|[[File:RP.jpg|left|200px|]] | |[[File:RP.jpg|left|200px|]] | ||
| Line 116: | Line 120: | ||
|} | |} | ||
| − | '''NEW MODE WITH | + | '''Rx LR: NEW MODE WITH E RELEASE FIRMWARE 2.717 and above:''' This mode is specifically designed for remote camera triggering, when you have a camera in your hand transmitting to the remote camera. Use regular LR mode for the transmitting radio and Rx LR on the remote radio. IMPORTANT: You should also DISABLE the hot shoe on the remote camera. You can do this by taking it out of the hot shoe, turning the camera's hot shoe off, or by holding in the D button till the display changes to Cd to indicate the Plus III's hot shoe is disabled. |
'''LR (Long Range) Mode Details:''' | '''LR (Long Range) Mode Details:''' | ||
*'''Legacy Firmware:''' Hit the Mode button to select LR mode. This function is only available in QuadZone Triggering Channels 17-32. Both the transmitting and receiving PocketWizard radios must be set to LR. | *'''Legacy Firmware:''' Hit the Mode button to select LR mode. This function is only available in QuadZone Triggering Channels 17-32. Both the transmitting and receiving PocketWizard radios must be set to LR. | ||
| − | *'''E Release Firmware:''' Hit the Mode button to select LR mode. You can now choose from LR Channels 1-80. | + | *'''E Release Firmware:''' Hit the Mode button to select LR mode for the transmitting radio. Hit the Mode button to select Rx LR mode for the receiving radio. You can now choose from LR Channels 1-80. |
| + | |||
'''RP (Repeater) Mode Details:''' | '''RP (Repeater) Mode Details:''' | ||
| Line 146: | Line 151: | ||
This is a new feature that allows the photographer to disable the hot shoe contact. This is most commonly used when a Plus III is in the hot shoe of a remote camera, to prevent Auto Relay Mode from engaging. | This is a new feature that allows the photographer to disable the hot shoe contact. This is most commonly used when a Plus III is in the hot shoe of a remote camera, to prevent Auto Relay Mode from engaging. | ||
| − | + | If a PocketWizard radio in the hot shoe of a remote camera and connected by a remote cable is triggered, Auto Relay will engage and the radio will automatically transmit a relay signal, one Channel higher than the signal it received. For example: if the transmitting radio and the radio connected to the remote camera are set to Channel 1, that remote radio will then relay a transmitting signal on Channel 2. If there is a separate receiving radio, it will fire on Channel 2. This is the way the product is designed to work. | |
| − | However, if a second photographer is using Channel 2 | + | However, if a second photographer is using Channel 2, the relay signal could inadvertently trigger the second photographer’s equipment. |
| − | Normally that would not be an issue as there are rarely multiple PocketWizard shooters. In a situation like a professional basketball game, photographers need to register the Channels they plan to use. If a photographer is only planning on triggering remote cameras on (for example) Channel 24, another photographer could be assigned Channel 25. When the photographer using Channel 24 fires his camera remotely, his connected PocketWizard will trigger | + | Normally that would not be an issue as there are rarely multiple PocketWizard shooters at an event. In a situation like a professional basketball game, photographers need to register the Channels they plan to use. If a photographer is only planning on triggering remote cameras on (for example) Channel 24, another photographer could be assigned Channel 25. When the photographer using Channel 24 fires his camera remotely, unless he makes any changes, his connected PocketWizard will trigger the other photographer's remotes that were set to Channel 25. That would be a problem. To prevent this from happening, you can disable the hot shoe to prevent Auto Relay mode from engaging. |
To disable the hot shoe of the Plus IIIe, hold down the Zone D button for three seconds until the “CH” on the display changes to “Cd”. The Plus III will not receive any signal from its hot shoe. To disable this feature simply hold the Zone D button for another three seconds until “Cd” switched back to “CH” on the display or turn the radio off. When the radio is turned back on, it will return to an active hot shoe. | To disable the hot shoe of the Plus IIIe, hold down the Zone D button for three seconds until the “CH” on the display changes to “Cd”. The Plus III will not receive any signal from its hot shoe. To disable this feature simply hold the Zone D button for another three seconds until “Cd” switched back to “CH” on the display or turn the radio off. When the radio is turned back on, it will return to an active hot shoe. | ||
*'''Legacy Firmware:''' This feature is available in firmware version 1.215 | *'''Legacy Firmware:''' This feature is available in firmware version 1.215 | ||
| − | *'''E Release Firmware:''' This feature is available in firmware version 2.505 | + | *'''E Release Firmware:''' This feature is available in firmware version 2.505 and higher |
==Plus III CUSTOM ID== | ==Plus III CUSTOM ID== | ||
| Line 165: | Line 170: | ||
When using a Plus IIIe radio with Custom ID(s) installed and the firmware versions listed below, one can move the Custom ID(s) to a different Channel and, therefore, a different frequency. Please refer to the [[Channels]] article for Channel/frequency pairs for E Release Flash and E Release (Long Range) Camera channels. | When using a Plus IIIe radio with Custom ID(s) installed and the firmware versions listed below, one can move the Custom ID(s) to a different Channel and, therefore, a different frequency. Please refer to the [[Channels]] article for Channel/frequency pairs for E Release Flash and E Release (Long Range) Camera channels. | ||
| − | To move the | + | To move the Custom ID(s) on the Plus IIIe, select the Channel you wish to move the ID(s) to and then hold down the Zone "C" button until the “CH” on the display changes to “CC”. The installed Custom ID(s) will be moved to the Channel you have selected. This will move your Custom IDs to the new Channel & frequency for BOTH regular (flash) E Channels and LR (Long Range) camera Channel. |
'''NOTE: The flash and LR (camera) Channels are separate and use different frequencies. Please see the [[Channels]] page for specific frequencies for each Channel. | '''NOTE: The flash and LR (camera) Channels are separate and use different frequencies. Please see the [[Channels]] page for specific frequencies for each Channel. | ||
| Line 173: | Line 178: | ||
will now be on Channel 3 instead, using Channel 3's frequency. | will now be on Channel 3 instead, using Channel 3's frequency. | ||
| − | FACTORY RESET: To restore the Custom ID(s) to their original Channel and frequency, perform a factory reset. Turn the unit off, then press and hold the "TEST" button while turning the unit on. Continue holding the "TEST" button until all of the segments (icons) on the LCD display are displayed | + | FACTORY RESET: To restore the Custom ID(s) to their original Channel and frequency, perform a factory reset. Turn the unit off, then press and hold the "TEST" button while turning the unit on. Continue holding the "TEST" button until all of the segments (icons) on the LCD display are displayed, then release the "TEST" button. The Custom ID(s) will be restored to their original Channel(s) and frequency(ies). |
EXAMPLE 2: After performing the steps in EXAMPLE 1 above, | EXAMPLE 2: After performing the steps in EXAMPLE 1 above, | ||
| Line 193: | Line 198: | ||
MODES: TxRx, Rx Only, Tx Only, LR or RP - When moving a Custom ID to any Channel from 1 to 32 in any of the modes listed above, the Custom ID will be available on that Channel in all of those modes. | MODES: TxRx, Rx Only, Tx Only, LR or RP - When moving a Custom ID to any Channel from 1 to 32 in any of the modes listed above, the Custom ID will be available on that Channel in all of those modes. | ||
| − | MODES: LR - When moving a Custom ID | + | MODES: LR - When moving a Custom ID with the radio set to LR mode to a Channel from 33 to 80, the Custom ID will only be available while in LR mode because the other modes only have 32 Channels. |
MODES: HSR - Custom IDs are not used in HSR mode and are not available in HSR mode even if "CC" is displayed on the LCD while in HSR mode. | MODES: HSR - Custom IDs are not used in HSR mode and are not available in HSR mode even if "CC" is displayed on the LCD while in HSR mode. | ||
| − | SPECIAL CASE: Moving Multiple Custom IDs to Channel 32 - If a unit has 2 Custom IDs installed and Channel 32 is selected | + | SPECIAL CASE: Moving Multiple Custom IDs to Channel 32 - If a unit has 2 Custom IDs installed and Channel 32 is selected as the new Channel, the first Custom ID will be moved to Channel 32 while the second Custom ID, and any additional Custom IDs, will be moved to LR channel 33, and so on. The Custom ID frequency will not be available for flash Channels, as Flash Channels are only available from 1-32. |
EXAMPLE 5: A unit has Custom IDs installed on Channels 17 and | EXAMPLE 5: A unit has Custom IDs installed on Channels 17 and | ||
| Line 209: | Line 214: | ||
==Channels and Zones== | ==Channels and Zones== | ||
| − | Some PocketWizard® radios, like the MiniTT1® or FlexTT5®, operate on Standard Channels as well as ControlTL® Channels. ControlTL Channels work with TTL or remote flash power control. | + | PocketWizard radios use different Channels, which operate at different frequencies, to send and receive signals. Legacy protocol firmware has 2 main types of Channels-Standard and ControlTL. Some PocketWizard® radios, like the MiniTT1® or FlexTT5®, operate on Standard Channels as well as ControlTL® Channels. ControlTL Channels work with TTL or remote flash power control. |
| + | |||
| + | Plus III radios with Legacy firmware installed can work with any PocketWizard radio transmitting or receiving on Classic Channels. They cannot use ControlTL Channels. | ||
| + | |||
| + | Plus IIIs that have been upgraded to the E Release can only work with other radios that have also been upgraded to E Release firmware. A radio that has been upgraded to the E Release can also be downgraded at any time via the Utility to work with Legacy Channels. | ||
*'''Legacy Firmware:''' The Plus® III Transceiver supports 32 different Standard Channels. Each Standard Channel represents a digital code transmitted on specific PocketWizard radio frequencies. This enables many photographers to work in the same area or for one photographer to exclusively control different sets of receivers. A Plus III will trigger any number of receiving PocketWizard radios set to the same Channel. Radios set to different channels will not trigger each other. Press the Channel Up/Channel Down Buttons to change channels. Features that use Zones are only available on channels 17-32. | *'''Legacy Firmware:''' The Plus® III Transceiver supports 32 different Standard Channels. Each Standard Channel represents a digital code transmitted on specific PocketWizard radio frequencies. This enables many photographers to work in the same area or for one photographer to exclusively control different sets of receivers. A Plus III will trigger any number of receiving PocketWizard radios set to the same Channel. Radios set to different channels will not trigger each other. Press the Channel Up/Channel Down Buttons to change channels. Features that use Zones are only available on channels 17-32. | ||
Latest revision as of 18:40, 29 October 2023
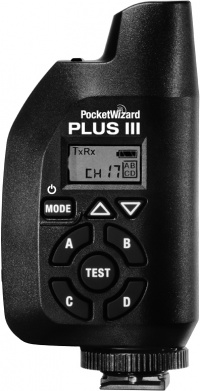
The Plus III/Plus IIIe is a radio transceiver, capable of acting as a transmitter or receiver for triggering remote flashes and cameras. It requires at least one other PocketWizard radio for wireless triggering. It is compatible with virtually any flash that has a sync port and any camera that can be triggered via the center hot shoe pin or by a PC port. It is a manual flash or camera trigger and can sync a remote flash up to the camera's X-sync.
The Plus III and Plus IIIe radios are physically the same product, with the same hardware. The difference is the firmware protocol each radio is using. The E Release firmware protocol was released in September 2019. Any PocketWizard Plus III produced before that date was programmed with the PocketWizard Legacy firmware protocol. Any Plus III produced after that date was shipped with the E Release firmware protocol upgrade installed and may be labeled as a Plus IIIe.
A Plus III with Legacy firmware can be upgraded to the E Release protocol via the PocketWizard Utility program. A Plus IIIe with the E Release firmware can be downgraded to the Legacy firmware via the PocketWizard Utility. For more details about the firmware protocol, please see our PocketWizard Firmware page. Most functions are the same between the two versions of firmware. The information below applies to both Plus III and Plus IIIe Transceivers. Operational differences between the two generations of firmware are noted below.
The Plus III is compatible with all other PocketWizard radios operating on the same frequency, using the same Channels, and firmware protocol. A Plus III with the E Release firmware is also compatible with the Raven by Fusion TLC.
Contents
Plus III Basics
Connecting
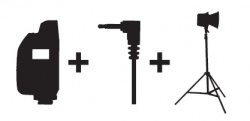
To trigger a remote flash: Connect a Plus III to your camera via the hot shoe. This will be your transmitting radio. Connect a Plus III to each of your remote flashes using the appropriate sync cable. These will be your receiving radios. If you are using a camera with no hot shoe or the hot shoe cannot be used, connect the transmitting Plus III’s Flash/Camera Port to the camera’s PC port. Visit our cablefinder to find the correct sync cables.
To trigger a remote camera: Connect a Plus III to your remote camera using the appropriate remote camera cable. This will be your receiving radio. If you are using a Plus III in your hand to trigger the remote camera, there is no cable needed for your transmitting radio. To trigger a remote camera while shooting from a handheld camera, connect a Plus III to your camera via the hot shoe. This will be your transmitting radio. For best results, connect a remote camera cable to the transmitting Plus III as well. Visit our cablefinder to find the correct remote camera cables.
Powering On/Off
Make sure batteries are properly installed. To turn on your Plus III, hold down the Power/MODE Button for about two seconds. You will see either a bold green blink if the radio has Legacy firmware installed or the LED will blink red green red green if it has the E Release firmware. The Status LED then blinks green every few seconds to indicate normal operation. It will blink red whenever the radio sends or receives a signal. Hold down the Power/MODE Button for about two seconds to turn off your Plus III.
Channels & Zones
Channels can be set via the Plus III’s Channel Up/Down Buttons. Your Plus III needs to be on the same Channel as other PocketWizard radios, using the same firmware protocol. A radio with Legacy firmware will not be able to communicate with a radio with the E Release. The Legacy firmware uses our Standard and Quad Zone Triggering Channels while the E Release firmware uses our E Channels and LR Channels. Each Channel uses a different frequency. To learn more about the Channels we use, see our Channels page.
- Legacy Firmware: Standard Channels 1-16 do not have separate Zones. When using Quad Zone Triggering Channels 17-32, you can specify Zones A, B, C, and/or D. See this section below for more details.
- E Release Firmware: When using E Channels 1-32, you can specify Zones A, B, C, and/or D. When using LR Channels 1-80, you can specify Zones A, B, C, and/or D. See this section below for more details.
Plus III FAQ
Having trouble with your Plus III? Check out our Plus III FAQ page!
Remote Flash Triggering
With transmitting and receiving PocketWizard® radios set to the same Channel and Zone, remote flashes will be synchronized with the camera, up to the camera's maximum X-sync speed (1/200-1/250 on most cameras).
- Attach a Plus III to your camera’s hot shoe. You may also connect the Plus III radio to your camera’s PC sync port using the included cable.
- Connect a Plus III to your remote flash via the appropriate sync cable.
- Select Channel and Zone A, B, C, or D via Channel Up/Down Buttons and Zone Toggle Buttons. Set any other PocketWizard radios to a matching Channel and Zone. See the “Using Zones” section for more information.
- Take pictures normally at or below your camera’s X-sync speed.
Momentarily pressing the TEST button will test trigger the flash.
Remote Manual Flash with Local TTL Flash
Plus III Transceivers do not transmit TTL information. You can use a TTL flash directly connected to your camera and have remote flashes (set to manual) triggered by PocketWizard radios. To operate in this manner, simply connect the Plus III's sync port to your camera’s PC terminal or the flash's PC port and make all other camera-to-TTL-flash connections normally.
There is a 1/2000 second delay when triggering via PocketWizard radios. This means your radio remote flashes will trigger 1/2000 second after your camera connected flash triggers. For very fast moving objects this may result in image streaking or 2 distinct flash moments on the same image (double exposures).
Remote Camera Triggering
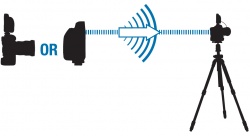
A Plus III, paired with any PocketWizard transmitter, can be used to trigger a remote camera. The camera needs to have an electronic shutter release connection and you need the correct remote camera cable for your camera. Remote camera cables are NOT included in the box when you purchase a new Plus III. Please visit see our cablefinder to determine the correct cable for your equipment. With transmitting and receiving PocketWizard radios set to the same Channel and Zone, remote flashes will be synchronized with the camera.
- Connect Plus III to your remote camera via the appropriate remote camera cable.
- Select Channel and Zone A, B, C, or D via the Channel Up/Down Buttons and Zone Toggle Buttons.
- For best results, use LR mode on the transmitting PocketWizard and Rx LR mode on the remote radio.
- Press the TEST button on the transmitting PocketWizard radio or fire the camera in your hands. The remote camera will trigger.
If the transmitting PocketWizard radio in your hands is a Plus III, you can pre-release the remote camera by pressing the TEST button half way. This wakes up the remote camera and lets it respond more quickly and consistently. It can also engage autofocus.
- Legacy Firmware: This function is available when using QuadZone Triggering Channels 17-32.
- E Release Firmware: This function is available on all QuadZone Triggering Channels - E Channels 1-32 and LR Channels 1-80.
If you are using a handheld camera to transmit to a remote handheld camera (with Plus IIIs on each camera), we suggest using a remote camera cable on both cameras for best results. Using QuadZone Triggering Channels and half pressing on your transmitting camera's shutter button will keep both cameras set to pre-release and enables the cameras to respond more quickly and consistently. Note: with most mirrorless cameras, you MUST use a cable on the handheld camera as well as the remote camera.
You can see more details about remote camera triggering here.
NOTE: A remote radio in the hot shoe of a remote camera and connected by a remote camera cable will automatically engage Auto Relay mode and send out a trigger on the next higher Channel. If you do not wish to engage Auto Relay mode, see the Disable Hot Shoe section below.
Auto Relay Mode
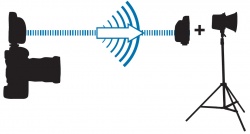
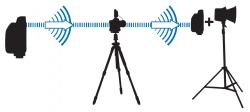
With Auto Relay mode, you can use a PocketWizard to remotely trigger your camera and also trigger remote flashes at the same time, in sync with the remote camera.
Auto Relay Mode requires 3 PocketWizard radios and is the only situation where not all PocketWizard radios are set to the same Channel. The relaying radio (on the camera) receives the signal on one Channel, then triggers the remote radios on the next higher Channel. For more details about Relay Mode, please see the Relay Mode page.
- Set the transmitting PocketWizard radio in your hands to a desired Channel and Zone. This radio can be set to either TxRx or Tx Only.
- Set the relaying Plus III for your remote camera to the same Channel as the radio in your hands and set Triggering Mode to TxRx.
- Connect the relaying Plus III’s Flash/Camera Port to the remote camera triggering port of the camera via a remote camera cable.
- Slide the relaying Plus III into your remote camera’s hot shoe. Be sure the hot shoe on the camera is enabled. This radio can be set to either Rx Only or TxRx.
- Connect your remote flash to a PocketWizard receiver via the appropriate sync cable and set it to one Channel higher than the transmitting PocketWizard radio in your hands. Make sure all of the radios are set to the same Zones.
- Press and release TEST on the PocketWizard transmitter in your hands to begin the sequence.
- Legacy Firmware: Simply use the next higher Channel as described above for the receiving radios for the flashes.
- E Release Firmware: You can combine LR Channels with E Channels for this. Use the LR Channels for the transmitter to camera, then an E Channel for the flash(es). The Channel numbers and Zones need to match as described above. For example: LR Channel 1 in your hand, LR Channel 1 on the camera, and E Channel 2 for the flashes.
NOTE: A remote radio in the hot shoe of a remote camera and connected by a remote camera cable will automatically engage Auto Relay mode and send out a trigger on the next higher Channel. If you are not using remote flashes and do not wish to engage Auto Relay mode, see the Disable Hot Shoe section below.
Modes of Operation
The Plus® III Transceiver supports six modes of triggering for different applications. You can switch between modes by pressing and quickly releasing the MODE button.
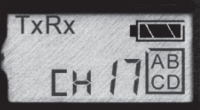
| TxRx Mode allows the radio to be used as a transmitter attached to a camera or as a receiver connected to a remote flash or remote camera. As an Auto-Sensing Transceiver, the Plus III automatically switches between transmit and receive. This is the default mode. | |
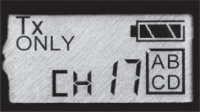
| Tx Only Mode disables all receiving (Rx) functionality and allows you to use your Plus III as a transmitter only. Use this mode when sharing remote flashes with other photographers. This mode will prevent other photographers from triggering the Plus III on your camera. | |
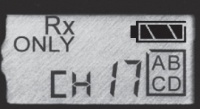
| Rx Only Mode disables all transmit (Tx) functionality allowing you to use your Plus III radios as receivers for remote flashes or remote cameras. Use this mode when you do not want a remote Plus III to perform relay functions when mounted in the shoe of a remote camera, or to prevent a remote Plus III from triggering other radios when its TEST button is pressed. | |
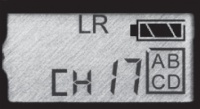
| LR (Long Range) Mode dramatically increases the maximum range of a radio in a given shooting environment. Long Range Mode must be enabled on both transmitting and receiving radios. Use this mode when triggering remote cameras at greater distances. It can also be used with remote flash, but there may be a reduction in maximum X-sync speed.
This function behaves differently with Legacy firmware than with the E Release upgrade. There is also a new Rx LR mode for E Release. Please see below for details. | |
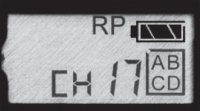
| RP (Repeater) Mode allows you add one or more Plus III radio(s) between a pair of transmitting and receiving units to extend your range and increase the maximum triggering distance. This mode is recommended when triggering remote cameras. It can be used with flash with a reduction in maximum X-sync speed. This is not the same operation as Auto-Relay Mode
This function behaves differently with Legacy firmware than with the E Release upgrade. Please see below for details. | |
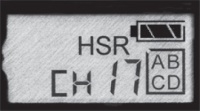
| HSR (High Speed Receive) Mode shortens the contact time of the Flash/Camera Port, allowing for triggering of remote flashes at higher FPS (frames per second). This radio does not support HSS (High Speed Sync) | |
Rx LR: NEW MODE WITH E RELEASE FIRMWARE 2.717 and above: This mode is specifically designed for remote camera triggering, when you have a camera in your hand transmitting to the remote camera. Use regular LR mode for the transmitting radio and Rx LR on the remote radio. IMPORTANT: You should also DISABLE the hot shoe on the remote camera. You can do this by taking it out of the hot shoe, turning the camera's hot shoe off, or by holding in the D button till the display changes to Cd to indicate the Plus III's hot shoe is disabled.
LR (Long Range) Mode Details:
- Legacy Firmware: Hit the Mode button to select LR mode. This function is only available in QuadZone Triggering Channels 17-32. Both the transmitting and receiving PocketWizard radios must be set to LR.
- E Release Firmware: Hit the Mode button to select LR mode for the transmitting radio. Hit the Mode button to select Rx LR mode for the receiving radio. You can now choose from LR Channels 1-80.
RP (Repeater) Mode Details:
- Legacy Firmware: This mode automatically retransmits any triggers on the selected Legacy Channel. Place a Plus III half way between the transmitting and receiving radios and set the transceivers all for the same Channel. You may use multiple repeaters for extremely long distances. Make sure each repeating radio can only receive the signal from one other radio, otherwise an endless trigger loop could occur! Put the transmitting radio into Tx ONLY Mode for best performance when using Repeater Mode.
- E Release Firmware: RP mode with the E Release uses different Channels. Set the transmitting and first Repeater radio to the same Channel. Then increase the Channel number for each successive repeater unit. For example: If you are using ONE Repeater in the middle, set the transmitting and Repeater radio to Channel 1. Set the receiving radio to Channel 2. If you are using a total of 5 radios for a very long distance, set the transmitter and first Repeater to Channel 1, the second Repeater to Channel 2, the third Repeater to Channel 3, and the receiving radio to Channel 4.
Special Features
Fast Mode
The Plus III can be set to trigger more quickly which reduces flash clipping at or around X-sync for some cameras. Clipping appears as a black bar, or underexposed area, usually at the bottom of your image. It can happen with slower shutter cameras (1/200 X-sync cameras usually have slower shutters), combined with a longer duration flash. These timing factors, combined with the time it takes for the Plus III to transmit and receive, can cause clipping in some situations. You can use either of these methods, or combine them, to speed up the Plus III triggering time and possibly eliminate flash clipping in your images:
Method 1: Tx Only mode: Use the MODE button to set your on-camera radio to Tx Only Mode. This enables the Plus III to respond about 15% faster to triggers from the camera. This simple method may be all you need to eliminate clipping for most situations.
Method 2: Fast Mode: Set your receiving radio, connected to a flash, to Fast Mode. This feature is only available on QuadZone Triggering Channels, and trades the ability to set a specific Zone for a faster trigger response time. You need to engage Fast Mode on each receiving Plus III connected to a flash. Setting it on your on camera transmitting radio will have no effect.
- Legacy Firmware: This function is available when using QuadZone Triggering Channels 17-32.
- E Release Firmware: This function is available on all QuadZone Triggering Channels - E Channels 1-32 and LR Channels 1-80
To engage Fast Mode:
- Set each receiving Plus III to a QuadZone Triggering Channel.
- Use the MODE button to set HSR (High Speed Receive) Mode. HSR Mode does not affect clipping by itself (it is for faster FPS (Frames Per Second)), but is required for Fast Mode. Note: HSR is different than HSS (High Speed Sync). This radio does not support HSS.
- Turn off all Zones by pressing the letters A, B, C, or D until no Zone indicators are showing on the LCD. The Channel indicator will change from CH to F to indicate you have entered Fast Mode.
Hot Shoe Disable
This is a new feature that allows the photographer to disable the hot shoe contact. This is most commonly used when a Plus III is in the hot shoe of a remote camera, to prevent Auto Relay Mode from engaging.
If a PocketWizard radio in the hot shoe of a remote camera and connected by a remote cable is triggered, Auto Relay will engage and the radio will automatically transmit a relay signal, one Channel higher than the signal it received. For example: if the transmitting radio and the radio connected to the remote camera are set to Channel 1, that remote radio will then relay a transmitting signal on Channel 2. If there is a separate receiving radio, it will fire on Channel 2. This is the way the product is designed to work.
However, if a second photographer is using Channel 2, the relay signal could inadvertently trigger the second photographer’s equipment.
Normally that would not be an issue as there are rarely multiple PocketWizard shooters at an event. In a situation like a professional basketball game, photographers need to register the Channels they plan to use. If a photographer is only planning on triggering remote cameras on (for example) Channel 24, another photographer could be assigned Channel 25. When the photographer using Channel 24 fires his camera remotely, unless he makes any changes, his connected PocketWizard will trigger the other photographer's remotes that were set to Channel 25. That would be a problem. To prevent this from happening, you can disable the hot shoe to prevent Auto Relay mode from engaging.
To disable the hot shoe of the Plus IIIe, hold down the Zone D button for three seconds until the “CH” on the display changes to “Cd”. The Plus III will not receive any signal from its hot shoe. To disable this feature simply hold the Zone D button for another three seconds until “Cd” switched back to “CH” on the display or turn the radio off. When the radio is turned back on, it will return to an active hot shoe.
- Legacy Firmware: This feature is available in firmware version 1.215
- E Release Firmware: This feature is available in firmware version 2.505 and higher
Plus III CUSTOM ID
A Custom ID is a private digital code that can be installed on Plus III radios. The feature is very helpful when shooting in venues with a large number of photographers. Please see the Multiuser Environments page for more info about Custom IDs.
Moving CUSTOM ID(s) to a Different Channel and Frequency
This is a new feature available with E Release firmware. It allows the photographer to move the Custom ID(s) on their Plus IIIe radios to another Channel in order to use a different frequency. This is most commonly used at large venues with many other photographers using PocketWizard radio products. It can help limit the number of PocketWizard Radios on a particular frequency and increase Channel separation, which decreases the likelihood of missed triggers. Please refer to the PocketWizard Games article for additional information regarding working with PocketWizard units at large events with other PocketWizard users.
When using a Plus IIIe radio with Custom ID(s) installed and the firmware versions listed below, one can move the Custom ID(s) to a different Channel and, therefore, a different frequency. Please refer to the Channels article for Channel/frequency pairs for E Release Flash and E Release (Long Range) Camera channels.
To move the Custom ID(s) on the Plus IIIe, select the Channel you wish to move the ID(s) to and then hold down the Zone "C" button until the “CH” on the display changes to “CC”. The installed Custom ID(s) will be moved to the Channel you have selected. This will move your Custom IDs to the new Channel & frequency for BOTH regular (flash) E Channels and LR (Long Range) camera Channel. NOTE: The flash and LR (camera) Channels are separate and use different frequencies. Please see the Channels page for specific frequencies for each Channel.
   EXAMPLE 1: A unit has a Custom ID installed on Channel 17.
   Set the Channel to 3 and hold the "C" button until the "CH"
   changes to "CC". The Custom ID, previously on Channel 17
   will now be on Channel 3 instead, using Channel 3's frequency.
FACTORY RESET: To restore the Custom ID(s) to their original Channel and frequency, perform a factory reset. Turn the unit off, then press and hold the "TEST" button while turning the unit on. Continue holding the "TEST" button until all of the segments (icons) on the LCD display are displayed, then release the "TEST" button. The Custom ID(s) will be restored to their original Channel(s) and frequency(ies).
   EXAMPLE 2: After performing the steps in EXAMPLE 1 above,
   perform a factory reset. The Custom ID will revert to its
   original Channel (17) and use Channel 17's frequency.
UNITS WITH MULTIPLE CUSTOM IDs: When a unit has multiple Custom IDs installed and the Zone "C" key is used to move them, the Custom IDs will all be moved to consecutive Channels starting with the Channel where the Zone "C" button was held to move them.
   EXAMPLE 3: If a unit has Custom IDs on channels 17 and 18 and
   the Zone "C" button is held on Channel 5, the Custom IDs will
   be moved to Channels 5 and 6 respectively, and use those
   frequencies.
   EXAMPLE 4: If a unit has Custom IDs installed on Channels 17
   and 23 and the Zone "C" button is held on Channel 1, the
   Custom IDs will be moved to Channels 1 and 2 respectively and
   use those frequencies.
MODES: TxRx, Rx Only, Tx Only, LR or RP - When moving a Custom ID to any Channel from 1 to 32 in any of the modes listed above, the Custom ID will be available on that Channel in all of those modes.
MODES: LR - When moving a Custom ID with the radio set to LR mode to a Channel from 33 to 80, the Custom ID will only be available while in LR mode because the other modes only have 32 Channels.
MODES: HSR - Custom IDs are not used in HSR mode and are not available in HSR mode even if "CC" is displayed on the LCD while in HSR mode.
SPECIAL CASE: Moving Multiple Custom IDs to Channel 32 - If a unit has 2 Custom IDs installed and Channel 32 is selected as the new Channel, the first Custom ID will be moved to Channel 32 while the second Custom ID, and any additional Custom IDs, will be moved to LR channel 33, and so on. The Custom ID frequency will not be available for flash Channels, as Flash Channels are only available from 1-32.
   EXAMPLE 5: A unit has Custom IDs installed on Channels 17 and
   20. Channel 32 is selected and the Zone "C" button is held
   until "CH" changes to "CC". The ID will now be on Channel 32
   in all modes, except HSR, and the second Custom ID will only
   be available on Channel 33 in LR mode.
- Legacy Firmware: This feature is NOT AVAILABLE in any legacy firmware versions (IE: v1.215 or below)
- E Release Firmware: This feature is available in firmware version 2.711 or higher
Channels and Zones
PocketWizard radios use different Channels, which operate at different frequencies, to send and receive signals. Legacy protocol firmware has 2 main types of Channels-Standard and ControlTL. Some PocketWizard® radios, like the MiniTT1® or FlexTT5®, operate on Standard Channels as well as ControlTL® Channels. ControlTL Channels work with TTL or remote flash power control.
Plus III radios with Legacy firmware installed can work with any PocketWizard radio transmitting or receiving on Classic Channels. They cannot use ControlTL Channels.
Plus IIIs that have been upgraded to the E Release can only work with other radios that have also been upgraded to E Release firmware. A radio that has been upgraded to the E Release can also be downgraded at any time via the Utility to work with Legacy Channels.
- Legacy Firmware: The Plus® III Transceiver supports 32 different Standard Channels. Each Standard Channel represents a digital code transmitted on specific PocketWizard radio frequencies. This enables many photographers to work in the same area or for one photographer to exclusively control different sets of receivers. A Plus III will trigger any number of receiving PocketWizard radios set to the same Channel. Radios set to different channels will not trigger each other. Press the Channel Up/Channel Down Buttons to change channels. Features that use Zones are only available on channels 17-32.
- E Release Firmware: The Plus® III Transceiver supports 32 different E Channels and 80 different Long Range (LR) Channels. Each Standard Channel represents a digital code transmitted on specific PocketWizard radio frequencies. This enables many photographers to work in the same area or for one photographer to exclusively control different sets of receivers. A Plus III will trigger any number of receiving PocketWizard radios set to the same Channel. Radios set to different channels will not trigger each other. Press the Channel Up/Channel Down Buttons to change channels. To access the LR Channels, push the mode button until you see LR appear. The radio is now in Long Range mode and you are selecting LR Channels.
Zones can be used to toggle remote cameras or flashes on or off from a transmitting PocketWizard radio. Zones can also be used when sharing flashes with another photographer so only some of the remote flashes are shared, even when using the same Channel. Zones A, B, C, and D are selectable via the Plus III’s Zone Toggle Buttons when using channels 17-32. The enabled Zones are displayed in a box on the right side of the LCD. You can enable any combination of all four Zones. A receiving Plus III will only trigger if the transmitting PocketWizard radio has at least one matching Zone enabled.
- Legacy Firmware: Zones A, B, C, and D are selectable via the Plus III’s Zone Toggle Buttons when using Channels 17-32.
- E Release Firmware: Zones A, B, C, and D are selectable via the Plus III’s Zone Toggle Buttons when using all Channels - E Channels 1-32 and LR Channels 1-80.
Other Functions
TEST Button (Two Stage Trigger)
Half-pressing the TEST button on a transmitting Plus® III pre-releases a remote camera connected to a receiving PocketWizard® radio with a remote -ACC camera cable. This wakes up the camera and makes it respond more quickly and consistently, but also reduces battery life. Half-pressing this button does not affect remote flashes. Fully pressing the TEST button fires any remote cameras or flashes connected to receiving PocketWizard radios set to the same Channel and Zones.
- Legacy Firmware: This function is available with QuadZone Triggering Channels 17-32 only.
- E Release Firmware: This function is available with all QuadZone Triggering Channels - E Channels 1-32 and LR Channels 1-80.
To learn more about receiving radios that are compatible with Plus III remote half-press, visit our Plus III Half-Press Compatibility page.
Status LED
When you first turn on the radio, you will see a specific power on signal.
- Legacy Firmware: You will see one bold green blink.
- E Release Firmware: You will see a red, green, red, green red sequence.
Then the Plus III’s status LED will blink in three different colors: green, red and amber.
1 Green blink indicates good battery life.
2 Amber blinks indicate the batteries are getting low or when TEST button is half-pressed.
3 Red blinks indicates batteries are critically low and should be changed immediately. The status LED turns solid red when Plus III is transmitting or receiving a trigger.
Reset
To reset your Plus III Transceiver back to the default setting, hold the TEST button as you power the radio on.
- Legacy Firmware: The default mode after a reset is TxRx on Channel 17 with all Zones enabled.
- E Release Firmware: The default mode after a reset is TxRx on Channel 1 with all Zones enabled.
USB Connection
The Plus III can be powered via USB with a compatible AC adapter or from most computers. We suggest using the PocketWizard PW-AC-USB. Firmware updates and upgrades can be installed via the PocketWizard Utility. The Plus III uses a standard mini B USB port.
Sustaining High Performance
Your PocketWizard® radios use the environment as a medium for transmitting and receiving radio signals. The performance of your radios depends on their placement in the environment, nearby radio interference, and the radios’ orientation and position relative to each other.
Wireless Basics
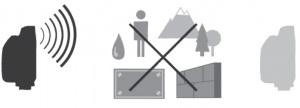
Whenever possible, maintain a line of sight between radios and keep antennas parallel. Make sure radios are not near any large metal, concrete, or high water-content objects. People and trees are mostly water! Make sure radios are not blocked by these objects or by hills.
The Plus III Transceiver’s antenna is fairly omnidirectional and its orientation should not significantly impact performance in most shooting scenarios, but optimizing for radio reception will always improve the maximum range.
Maintain at least a 12” distance between antennas. Avoid direct antenna contact with anything metallic. “Dead spots” have a number of causes, but the solution is usually the same: move the radio a few inches or feet away from the problem area. Always obey the laws of physics.
Radio Basics
Always remove the batteries from electronic devices when storing the units for an extended period of time to prevent battery leakage. Remove spent batteries promptly.
Be sure you are using the most current version of firmware available.
If you are having any trouble with the radios, always start with a reset.
As with any electronic, store the unit in a cool, dry place, away from dust.
Do not connect any device to this unit unless that device is approved by LPA Design / PocketWizard. Connection to unapproved devices may cause damage and will void your warranty.
To clean your PocketWizard, use a lightly dampened cloth to wipe the exterior surface. Do not use solvents or other cleansers. Do not immerse the unit in any liquid.
Technical Information
Frequency: Plus® III FCC/IC: 340.00 – 354.00 MHz
- Plus® III CE: 433.42 – 434.42 MHz
Transmit Output Power: Less than 1 milliwatt (1/1000 of a watt)
Batteries: 2 x AA (IEC:LR6)
Battery Life: Up to 50 hours (with alkaline batteries)
Triggering Delay: 1/1200 of a second
Bandwidth: Narrowband
- 70KHz Transmit
- 230KHz Receive
| Operating Temperature: | Above -15° C (5° F) and below 50° C (120° F) |
| Always use fresh batteries in cold temperatures. | |
Storage Temperature (without batteries): Above -30° C (-22° F) and below 85° C (185° F)
Flash/Camera Port Sync Voltage Tolerance: 300 Volts
Backlit LCD: The Plus III backlit LCD activates automatically when any button other than TEST is pressed. It turns off after 5 seconds.
LEDs: Red LEDs are used for dim light application and do not indicate a hazardous status.
CE Directive: Plus III CE confirms to council directive (1999/5/EC).
RoHS: Plus III FCC/IC and CE versions are RoHS compliant.
