Difference between revisions of "Basic Wireless TTL"
m (→Canon Basic Wireless E-TTL II) |
(→Canon Note) |
||
| (3 intermediate revisions by one other user not shown) | |||
| Line 32: | Line 32: | ||
==== Nikon Note ==== | ==== Nikon Note ==== | ||
| − | Please read your Nikon manuals on Advanced Wireless Lighting, also called CLS (Creative Lighting System). | + | The MiniTT1 and FlexTT5 mirror native Nikon CLS/iTTL behaviors closely. Please read your Nikon manuals on Advanced Wireless Lighting, also called CLS (Creative Lighting System) for details. |
This "No Flash On Camera" method is like using Nikon's wireless system with one of the following directly in the shoe of the camera: | This "No Flash On Camera" method is like using Nikon's wireless system with one of the following directly in the shoe of the camera: | ||
| Line 39: | Line 39: | ||
==== Canon Note ==== | ==== Canon Note ==== | ||
| − | Please read your Canon manuals on Fully Automatic Wireless Flash, also called E-TTL II Wireless Autoflash. | + | The MiniTT1, FlexTT5, and FlexTT6 mirror native Canon E-TTL behaviors closely. Please read your Canon manuals on Fully Automatic Wireless Flash, also called E-TTL II Wireless Autoflash, for more details. |
[[File:BasicWireless E-TTL II2.jpg|right|125px]] | [[File:BasicWireless E-TTL II2.jpg|right|125px]] | ||
This "No Flash On Camera" method is the same as using Canon’s wireless system with one of the following directly in the shoe of the camera: | This "No Flash On Camera" method is the same as using Canon’s wireless system with one of the following directly in the shoe of the camera: | ||
| Line 64: | Line 64: | ||
#Slide the MiniTT1 Transmitter onto the camera and tighten the locking ring. | #Slide the MiniTT1 Transmitter onto the camera and tighten the locking ring. | ||
#Slide a Canon Speedlite onto the MiniTT1 and secure the Speedlite's locking foot. | #Slide a Canon Speedlite onto the MiniTT1 and secure the Speedlite's locking foot. | ||
| − | #*[[Flash_Tab#Force_TTL_Master_Mode|Force TTL Master Mode]] is engaged by default. You can use <MASTER> Mode if your flash has it, or you can just place a flash in the radio's hot shoe set to normal ETTL mode. | + | #*[[Flash_Tab#Force_TTL_Master_Mode|Force TTL Master Mode]] is engaged by default. You can use <MASTER> Mode if your flash has it, or you can just place a flash in the radio's hot shoe set to normal ETTL mode. |
#Slide the remote Speedlite onto a FlexTT5 Transceiver, tighten the locking ring, and secure the FlexTT5. Repeat for each remote Speedlite. The remote Speedlites should be set to normal ETTL mode, not <MASTER> or <SLAVE>. | #Slide the remote Speedlite onto a FlexTT5 Transceiver, tighten the locking ring, and secure the FlexTT5. Repeat for each remote Speedlite. The remote Speedlites should be set to normal ETTL mode, not <MASTER> or <SLAVE>. | ||
#Power on your equipment from the top down (flash, then radio, then camera). | #Power on your equipment from the top down (flash, then radio, then camera). | ||
| Line 70: | Line 70: | ||
NOTE: You can use a 430EX (I or II) as a master flash! These flashes do not have a master mode, and cannot usually trigger remote E-TTL II flashes. [[Flash_Tab#Force_TTL_Master_Mode|Force TTL Master Mode]] is engaged by default which gives these flashes the ability to act as a single zone master flash. | NOTE: You can use a 430EX (I or II) as a master flash! These flashes do not have a master mode, and cannot usually trigger remote E-TTL II flashes. [[Flash_Tab#Force_TTL_Master_Mode|Force TTL Master Mode]] is engaged by default which gives these flashes the ability to act as a single zone master flash. | ||
| + | |||
| + | To use the flashes with High Speed Sync, the Master flash must be set for High Speed Sync via the flash's menu. It is not necessary for the remote flashes. | ||
====Nikon Basic Wireless i-TTL ==== | ====Nikon Basic Wireless i-TTL ==== | ||
Latest revision as of 10:32, 8 June 2017
| Next recommended reading: Advanced Wireless TTL |
Contents
This section talks about Basic Wireless TTL where all Speedlights are used as one zone of camera-controlled light and not independently controlled using zones, groups, or ratios. Read Advanced Wireless TTL for independently controlling different groups or zones of TTL flash, or for working with ratios. You may also want to read about Manual Flash.
Make sure you read the Getting Started section first!
| All references to TTL on this page refer exclusively to Canon's E-TTL II system, or Nikon's i-TTL/CLS.
Film TTL or earlier digital TTL systems are not supported. |
| "Speedlite" and "Speedlight" are used interchangeably. Either may be used to refer to Nikon or Canon's hot shoe flashes. Nikon or Canon specific information will be noted as needed. |
| REMINDER: Speedlights mounted on a remote FlexTT5 should be set to their standard i-TTL/E-TTL mode. Do not use <MASTER>, <REMOTE> or <SLAVE> modes on a remote flash. |
General TTL Considerations
There are several important factors to keep in mind when using the ControlTL system to extend wireless TTL:
- Operate the camera normally by pressing the shutter release button halfway to establish focus or metering before shooting. On some cameras, pressing the shutter release button too quickly before camera wakeup may cause the pre-flash to miss or cause an over/under-expose.
- The range of Canon or Nikon’s TTL ability to measure light may be exceeded by the range of the ControlTL system. In other words, it is possible to place Speedlites so far away that the camera cannot accurately measure their light in the frame. Adjust your remote flashes to light the subject better so the camera can make a proper exposure calculation.
- Angle of operation is extended. You can place flashes in more places, including behind you, than allowed by Canon or Nikon’s light pulse system.
No Flash On Camera
This simple mode of operation allows you to use one or more remote TTL flashes as one zone of light. All remote TTL flashes will fire at the same power level which is chosen automatically by the camera.
- Slide a MiniTT1 Transmitter onto the camera and tighten the locking ring.
- Slide a remote Speedlite onto a FlexTT5 Transceiver's hot shoe, tighten the locking ring, and secure the FlexTT5. Repeat for each remote Speedlite. The remote Speedlites should be set to normal mode, not <MASTER> or <SLAVE> or <REMOTE>.
- Power on your equipment from the top down (flash, then radio, then camera).
- Trigger normally.
Nikon Note
The MiniTT1 and FlexTT5 mirror native Nikon CLS/iTTL behaviors closely. Please read your Nikon manuals on Advanced Wireless Lighting, also called CLS (Creative Lighting System) for details.
This "No Flash On Camera" method is like using Nikon's wireless system with one of the following directly in the shoe of the camera:
- An SU-800 in TTL Commander mode, with a single remote group/zone selected as TTL with 0.0 FEC.
- An SB-800 or SB-900 as MASTER in Advanced Wireless Lighting TTL Mode with master flash cancelled and a single remote group/zone selected as TTL with 0.0 FEC.
Canon Note
The MiniTT1, FlexTT5, and FlexTT6 mirror native Canon E-TTL behaviors closely. Please read your Canon manuals on Fully Automatic Wireless Flash, also called E-TTL II Wireless Autoflash, for more details.
This "No Flash On Camera" method is the same as using Canon’s wireless system with one of the following directly in the shoe of the camera:
- An ST-E2 in non-ratio mode
- A 580EX (I or II) Speedlite in <MASTER> mode, main flash off, in non-ratio mode.
Flash on Camera
This mode is similar to the above, adding a flash on top of the ControlTL radio in the shoe of your camera.
Canon Basic Wireless E-TTL II
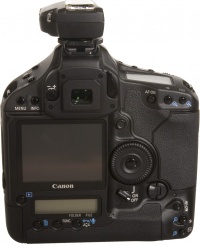
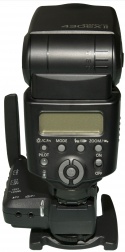
This mode is identical to the above, adding a flash to the top hot shoe of the MiniTT1. All remote E-TTL II flashes and the master flash will be treated as one zone of light and will fire at the same power level which is chosen automatically by the camera.
- Slide the MiniTT1 Transmitter onto the camera and tighten the locking ring.
- Slide a Canon Speedlite onto the MiniTT1 and secure the Speedlite's locking foot.
- Force TTL Master Mode is engaged by default. You can use <MASTER> Mode if your flash has it, or you can just place a flash in the radio's hot shoe set to normal ETTL mode.
- Slide the remote Speedlite onto a FlexTT5 Transceiver, tighten the locking ring, and secure the FlexTT5. Repeat for each remote Speedlite. The remote Speedlites should be set to normal ETTL mode, not <MASTER> or <SLAVE>.
- Power on your equipment from the top down (flash, then radio, then camera).
- Fire your calibration shot, then trigger normally.
NOTE: You can use a 430EX (I or II) as a master flash! These flashes do not have a master mode, and cannot usually trigger remote E-TTL II flashes. Force TTL Master Mode is engaged by default which gives these flashes the ability to act as a single zone master flash.
To use the flashes with High Speed Sync, the Master flash must be set for High Speed Sync via the flash's menu. It is not necessary for the remote flashes.
Nikon Basic Wireless i-TTL
The Nikon i-TTL system does not have a basic mode where all remote zones and a MASTER flash are treated as a single zone of light. An attached Nikon flash must be set for MASTER mode, with a remote zone enabled, in order to trigger remote flashes.
Attaching a Nikon flash set for normal, non-MASTER operation will completely disable remote triggers. Only the on-camera flash will fire in this configuration.
In the Nikon i-TTL/CLS system, the MASTER flash is always treated as its own zone of light separate from remote groups or zones. If you want all of your remote Speedlights to trigger as one zone or group of light, just follow the steps in the Advanced Wireless TTL to set your MASTER flash, and set all of your remote Flex TT5 radios to Zone A. The Zone "M" setting will control the on-camera flash.


