PlusX
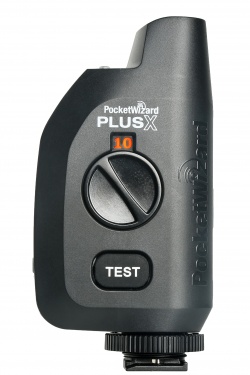
The PlusX is a radio transceiver, capable of acting as a transmitter or receiver for triggering remote flashes and cameras. To use the PlusX, at least one other PocketWizard radio is required. With the proper cable, it can be connected to virtually any remote flash or camera.
Much like its predecessors, the Plus II and Plus III, the PlusX is a manual flash trigger and is compatible with all PocketWizard radios on the same frequency. It can trigger a remote flash up to the camera's X-sync but is not capable of TTL metering, power control, or High Speed Sync. The PlusX uses Legacy firmware while the new PlusXe uses either E Release or Legacy firmware.
Contents
Introducing the PlusXe!
| BREAKING NEWS! As of September 2024, the PlusXe joined our line of E Release firmware products! |
The PlusXe works exactly the same as the PlusX EXCEPT that it uses our E Release firmware protocol. That means you can use it with any other PocketWizards that use the E Release, like a Plus IIIe or PowerMC2e, as well as the Raven from Fusion TLC.
If you would like to use the Legacy firmware instead, to work with your existing PocketWizard radios, you can easily change the firmware protocol. And then switch back to the E Release any time you want.
To change firmware protocol:
- Turn on the PlusXe
- Set the dial to Channel 4 and press Test
- Change the dial to Channel 3 and press Test
- Change the dial to Channel 2 and press Test
- Change the dial to Channel 1 and press Test
- Turn the PlusXe off then on again and the firmware will be set.
Do you already have PlusX radios but would love to upgrade to the E Release? You can send your radios in and we can upgrade them for you! Send us an email and we can walk you through the steps to purchase the licenses for upgrades and send in the radios.
All of the following information in this Wiki page as well as the PlusX quick guide applies to both the PlusXe and PlusX radios.
PlusX Basics
Connecting
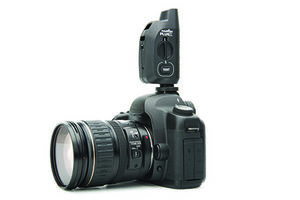
The PlusX can be connected to your camera in two different ways, either through the top shoe of the camera or with a sync cable.
Top Shoe: Slide the PlusX into the top shoe of the camera and secure it using the locking ring. Make sure to orient the antenna to the back of the camera while placing the radio into the hot shoe. Also be sure your hot shoe is active. There are some settings that automatically disable the hot shoe with mirrorless cameras.
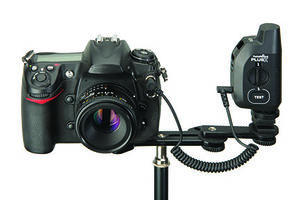
Sync Cable: If you are using a camera with no hot shoe, the hot shoe cannot be used, or you are remotely triggering your camera, connect the transmitting PlusX’s Flash/Camera Port to the camera’s sync terminal.
Flash Sync Connection: The PlusX can also be connected to almost any flash using the appropriate sync cable. Visit the PocketWizard Cable Finder to find the correct cable for your camera or flash.
Powering On/Off
Locate the switch on the left hand side of the radio (with the channel selector facing you). When the switch is down the unit is off and when in the up position it is on.
- If the radio is using Legacy firmware, you will see one bold green blink on the LED at power on, followed by a subtle green blink every second or so to let you know the radio is ready and waiting for a signal. The Channel selector will also be lit up.
- If the radio is using the E Release firmware, you will see a red green red green blink pattern on the LED at power on, followed by a subtle green blink every second or so to let you know the radio is ready and waiting for a signal. The Channel selector will also be lit up.
Channels
To change the channel on your radio simply turn the Channel Selector to find your desired channel. Turning the Channel Selector clockwise will change the channel in ascending order, turning it counter-clockwise will change the channel in descending order. When selecting your channel, make sure that the dial fully clicks into place otherwise you may not be transmitting/receiving on the correct channel.
Note: All radios MUST be on the same channel to properly trigger remote flashes or cameras (except when using Auto-Relay). They must also be using all the same firmware (either E Release or Legacy) and the same frequency (either FCC or CE).
Battery Indicator & LED Status Indicator
The LED on the top of the PlusX will blink three different colors (green, amber, and red) at different intervals to indicate the remaining battery power.
- One green blink indicates between 100% to 50% remaining battery life.
- Two amber blinks indicates between 50% to 25% remaining battery life.
- Three red blinks indicates less than 25% remaining battery life.
The LED also will turn red whenever the radio is transmits or receives a signal.
PlusX FAQ
Having trouble with your PlusX? Check out our PlusX FAQ page!
Remote Flash Triggering
With transmitting and receiving PocketWizard® radios set to the same channel, remote flashes will be synchronized with the camera.
- Attach a PlusX to your camera’s hot shoe. You may also connect the PlusX radio to your camera’s PC sync port using the appropriate cable.
- Connect a PlusX to your remote flash via the appropriate sync cable.
- Select a Channel. Set any other PocketWizard radios to matching the previously set Channel.
- Take pictures normally at or below your camera’s X-sync speed.
Momentarily pressing the TEST button will test trigger the flash.
Remote Camera Triggering
With transmitting and receiving PocketWizard® radios set to the same channel, remote flashes will be synchronized with the camera.
- Connect PlusX to your remote camera via the appropriate remote camera cable.
- Select a Channel.
- Press the TEST button on the transmitting PocketWizard radio or fire the camera in your hands. The remote camera will trigger.
NOTE: If you are using a handheld camera with a transmitting radio to trigger a remote camera at the same time, we suggest using a cable on BOTH cameras for best results. Some camera settings automatically disable the hot shoe, such as electronic shutter, silent shooting, or the fastest FPS setting. In these cases, you will need to use a cable on the handheld camera as the camera will not send a signal through the hot shoe. Please see our Remote Camera Triggering page for more details.
Features
Transmit Only Mode
Transmit Only mode allows you to disable the receiver function of the PlusX. Use this mode when sharing remote flashes with other photographers. This mode will prevent other photographers from triggering the PlusX on your camera.
To put the PlusX into Transmit Only Mode:
- Start with the radio powered off.
- Press and hold the TEST button.
- Turn on the radio and then release the TEST button
If performed correctly the selected Channel and LED should blink every couple seconds. In this mode, the PlusX will not be able to receive a signal, it will only transmit signals. Do not select this if you are connecting a PlusX to a receiving flash. To disable this mode simply turn the radio off and then back on again.
Auto-Relay
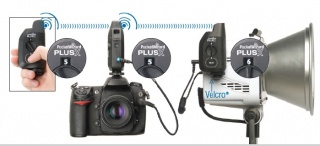
Auto-Relay allows you to trigger remote flashes in sync with a remote camera and requires only three PocketWizard radios. Using Auto-Relay is the only situation where not all PocketWizard radios are set to the same channel since the relaying radio triggers them one channel higher than it received on.
To preform Auto-Relay:
- Set your transmitting PocketWizard radio to your desired channel.
- Set the relaying PocketWizard radio for your remote camera to the same channel as the radio in your hands.
- Connect the relaying PocketWizard radio’s Flash/Camera Port to the remote camera triggering post of the camera via a remote camera cable.
- Slide the relaying PlusX into the remote camera’s hot shoe.
- Connect your remote flash to a PocketWizard receiving radio via the appropriate sync cable and set it to one channel higher than the transmitting PocketWizard radio in your hands.
- Press and release TEST on the PocketWizard transmitter in your hands to fire both the remote camera and remote flash in sync.
Sustaining High Performance
Your PocketWizard radios use the environment as a medium for transmitting and receiving radio signals. The performance of your radios depends on their placement in the environment, nearby radio interference, and the radios’ orientation and position relative to each other.
Wireless Basics
Whenever possible, maintain a line of sight between radios and keep antennas parallel. Make sure radios are not near any large metal, concrete, or high water-content objects. People and trees are mostly water! Make sure radios are not blocked by these objects or by hills.
The PlusX Transceiver’s antenna is fairly omnidirectional and its orientation should not significantly impact performance in most shooting scenarios, but optimizing for radio reception will always improve the maximum range.
Maintain at least a 12” distance between antennas. Avoid direct antenna contact with anything metallic. “Dead spots” have a number of causes, but the solution is usually the same: move the radio a few inches or feet away from the problem area.
Technical Information
| Frequency | FCC/IC model: 344.04MHz
CE model: 433.62 MHz |
| Channels | PlusX: 10 Standard Channels with Legacy firmware
PlusXe: 10 E Release Channels |
| Zones | Single zone |
| Antenna | Precision tuned internal coil |
| Channel Setting | Backlit rotating dial |
| Range | Up to 1,600 feet (500 meters)
(Actual range is dependent on multiple factors including equipment, mode, environment, positioning, orientation and interference) |
| Sync Speed | Up to 1/250 for focal plane shutters |
| Triggering Speed | Up to 14.5 FPS |
| Contact Time | 62 milliseconds in normal operation |
| Status Indicator | LED: Green, Amber, Red status indications
Solid Red: Triggering signal sending or receiving Single Green Blink: Status OK, > 50% battery life Double Amber Blink: Battery life < 50% but > 25% Triple Red Blink: Battery life < 25%, change batteries |
| Transmit Output Power | Less than 1 milliwatt (0.001 watt) |
| Power | Two (2), AA (LR6), 1.5v alkaline recommended
NiMH, NiCAD, NiZn, Lithium acceptable (these chemistries may not report battery life accurately) DO NOT USE 3.6V Li-Ion AA cells! |
| Battery Life | Up to 100 hours (with alkaline batteries) |


