Difference between revisions of "AC9 AlienBees Adapter"
| Line 57: | Line 57: | ||
| | | | ||
|} | |} | ||
| + | |||
| + | =How to use your AC9= | ||
| + | |||
| + | 1. Slide the AC9 onto your remote FlexTT5 and connect the REMOTE cable from the AC9 to the flash. | ||
| + | |||
| + | 2. Turn on the flash first, then the remote FlexTT5 radio. If this order is reversed, the flash may not trigger properly. The AC9’s Status LED blinks green occasionally to indicate normal operation. | ||
| + | |||
| + | 3. Turn on the modeling light and set it to Cycle or Ready mode as desired, and disable the optical slave by inserting a plug or adapter into the sync port. Power level will be set by the AC9. | ||
| + | |||
| + | 4. Set up your camera and PocketWizard ControlTL transmitter. | ||
| + | |||
| + | 5. Take pictures. | ||
| + | |||
| + | 6. Adjust the Camera’s Flash Exposure Compensation (FEC) to adjust the output power of your remote flash. See the Camera FEC Range and Basic Power Control sections for more information on FEC. | ||
Revision as of 13:28, 29 August 2011
| Next recommended reading: MiniTT1 and FlexTT5 |
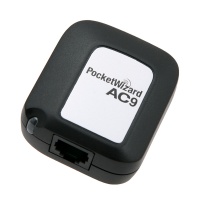
The AC9 AlienBees Adapter paired with a FlexTT5™ Transceiver enables remote power control of AlienBees or White Lightning flash. With a MiniTT1™ Transmitter or FlexTT5™ Transceiver on your camera, you can now adjust the power settings on your AlienBees or White Lightning flashes from the camera’s position. Add the AC3 ZoneController and you can control three different groups of lights in 1/3-stop increments with a six-stop range. Utilize PocketWizard’s unique features such as HyperSync™ and Optimized Rear Curtain Sync for maximum control of your lighting.
Requirements
The FlexTT5 for Canon requires AC9-C / FlexTT5 for Nikon requires AC9-N.
The AC9 AlienBees Adapter requires a receiving FlexTT5, a transmitting PocketWizard ControlTL radio such as a MiniTT1 or FlexTT5, and a compatible Paul C. Buff flash with a REMOTE terminal.
Compatibility
| AC9 AlienBees Adapter Compatiblity | ||||
|---|---|---|---|---|
| AlienBees | White Lightning | Zeus | UltraZAP | Ultra |
| B400 | X800 | Z1250 | UZ800 | Ultra600 |
| B800 | X1600 | Z2500 | UZ1600 | Ultra1200 |
| B1600 | X2400 | Ultra1800 | ||
| ABR800 | X3200 | |||
How to use your AC9
1. Slide the AC9 onto your remote FlexTT5 and connect the REMOTE cable from the AC9 to the flash.
2. Turn on the flash first, then the remote FlexTT5 radio. If this order is reversed, the flash may not trigger properly. The AC9’s Status LED blinks green occasionally to indicate normal operation.
3. Turn on the modeling light and set it to Cycle or Ready mode as desired, and disable the optical slave by inserting a plug or adapter into the sync port. Power level will be set by the AC9.
4. Set up your camera and PocketWizard ControlTL transmitter.
5. Take pictures.
6. Adjust the Camera’s Flash Exposure Compensation (FEC) to adjust the output power of your remote flash. See the Camera FEC Range and Basic Power Control sections for more information on FEC.
